Get Fired Up (Greek beads update + April plans)

Hey gang. Disheartening news: we are behind schedule for the first time ever. I know, it’s devastating, but we will make it through this hardship to April… where we’ll be looking at African beads!!! Very exciting, almost makes you forget about the great woes of March. Basically, I should have planned a little better around our spring break week but I ended up trying to rush the whole process in two weeks instead. Don’t do that.

After drawing up my plans I realized I had no idea how to make ceramics look like amber (a traditional material for Komboloi beads), so I made an outrageous amount of glaze test squares to determine the perfect combination that would yield that nice orange glow.

secret experiments in my evil ceramics lab >:)

Featured above is LG-57 “Intense Red”, TP-64 “Carrot”, V-303 “Terracotta”, LG-65 “Amber”, and S-2729 “Citrus Splash”. I tested nearly every possible combination of these glazes on red and white clay to see what would look the best, mostly using LG-65 as a topper for the other glazes to get that marbled burnt look.

the finalists

I ended up picking red clay because it seemed like I might get a better undertone with that as a base, and I think I was right! I ended up liking Carrot + Amber, Intense Red + Amber, and Citrus Splash + Amber (all above) more than the rest of the testers. I’m pretty new to layering glazes but I was pleased with these even if Citrus ended up a little wonky. For now, the plan if definitely to glaze the beads with the Carrot combo because I think that captured the orange tone the best.

beads + birdie charm

I will be very honest and vulnerable for a moment and tell you, cherished reader, that I made a truly abysmal first version of the owl charm. I had been making those tiny circle beads for two hours and I was so sick of having fancy mud on my hands that I did a poor job and ended up having to redo it later anyway because it looked so bad. This raw and emotional story (sarcasm) is an example of why it’s okay to take breaks, and how making art is so not worth it if you aren’t enjoying yourself (serious). I did a second pass at the owl charm for Athena and I’m much happier with it now. A lot of the delays came from having to expand the holes in every single bead because I poked them too small the first time and they would have closed after a bisque firing (because clay shrinks when you fire it!!). Rather than keep rushing through this week and risking a kiln explosion (I’m still explosionless for now, will keep you updated) by glazing and bisque-firing at the same time, I’ll be dipping these bad boys in glaze next week and tossing them in the kiln afterword.

I’ll be back here later to tell you more about the super exciting stuff to come, and I’ll hopefully have some history for you all about Mali and Burkina Faso!! Get hyped!

Greek Komboloi Beads

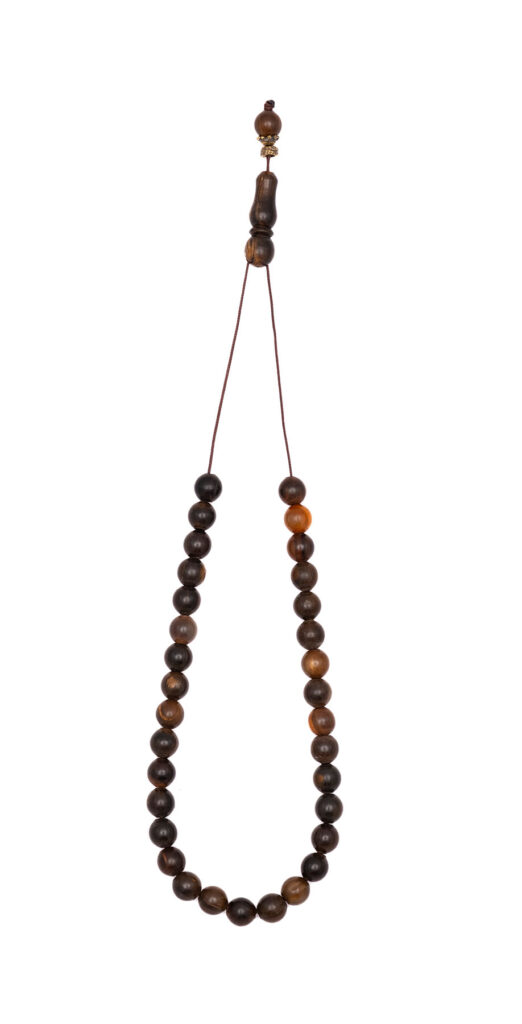
Hey team! We are back at it again with some more killer beads after a relaxing spring break hiatus. This month we’re looking at the great country of Greece and their traditional worry beads, also known as Komboloi beads. These beads are rumored to have originated in the grand mountains of Greece, made by monks and used for prayer as a precursor to the rosary. Almost like a beaded bracelet, a traditional Komboloi features an odd number of beads, usually any multiple of 4 + 1 extra, as well as a large charm that cinches the two ends of the string together.

These images from the Greek Komboloi Museum showcase the kind of structure I’m talking about, including an empty stretch of string for your funny little fingers. For my beads, I decided I wanted to make my charm a little more detailed to make up for the fact that I’m basically just making 22 copies of the same tiny sphere otherwise. For some inspiration, I looked up which Greek god is responsible for ceramic affairs, and lo and behold! It’s Athena! More generally known as the goddess of strategy, Athena is one of the coolest Greek gods and also Annabeth Chase’s mom.

Check out the gallery for some of the references I used drawing these plans!

In my research it seemed like these beads were typically made out of coral (reasonable for someone in the Mediterranean, not so much for Milo of North Carolina), but I thought I might pay homage to the other illustrious materials used for Komboloi by trying to make amber-adjacent beads!

I hope to get crackin’ on these beads this week and I can only pray that making an owl out of clay is not as hard as I fear it may be. See you all later this month with the results!!

I Made a Terrible Mess (And Also Finished My Beads)

Hello! It’s been a while!

While I was gone I embarked on a perilous mission to create homemade ceramics paint and constructed 9 whole red clay beads! Just in case you forgot, this month’s bead quest was inspired by ceramics from ancient Mexico. I took a leap of faith creating the slip paint for this project as well as making my very first pendants, and one of those was much messier than the other.

I cannot emphasize enough that my kitchen looked like it had been overrun by 7,000 muddy pigs. It was worth every second because I was ultimately successful but I would need a significant monetary incentive to try straining mud through a pasta colander again.

If you, dear reader, want to try making slip paint too, it’s actually incredibly easy! The method I used involved drying out a large helping of clay chunks of your desired color (the clay I used turns white when fired, but you can also add dyes if you need a different color). I then submerged the chunks in water and stopped pouring when the waterline was about an inch above the clay pile. After waiting for the water to start soaking into the clay, I started churning this stuff like butter. This part is by far the most taxing, and you will probably have to adjust how much water is in it a couple times while mixing to make sure the mud is actually liquid. Then, unfortunately, you have to pour the mixture through a strainer and into your desired container to make sure it’s smooth. This is not as physically draining as the mixing process, but I did feel despair surround my soul when I had to stick my entire hand into the goop.

After running the paint gauntlet, you can just use the mixture like any normal paint; just paint it onto your piece BEFORE bisque firing and send it in that kiln! Important to note that any streaks or lumps in the paint job won’t smooth out like glazes do when it’s fired, so paint carefully.

All in all I am absolutely thrilled with how these turned out, and I’m so pleased that my ridiculous plan to DIY slip paint actually worked! The white accents stand out exactly how I wanted.

See you soon for next month’s project!

Bead Plans Complete

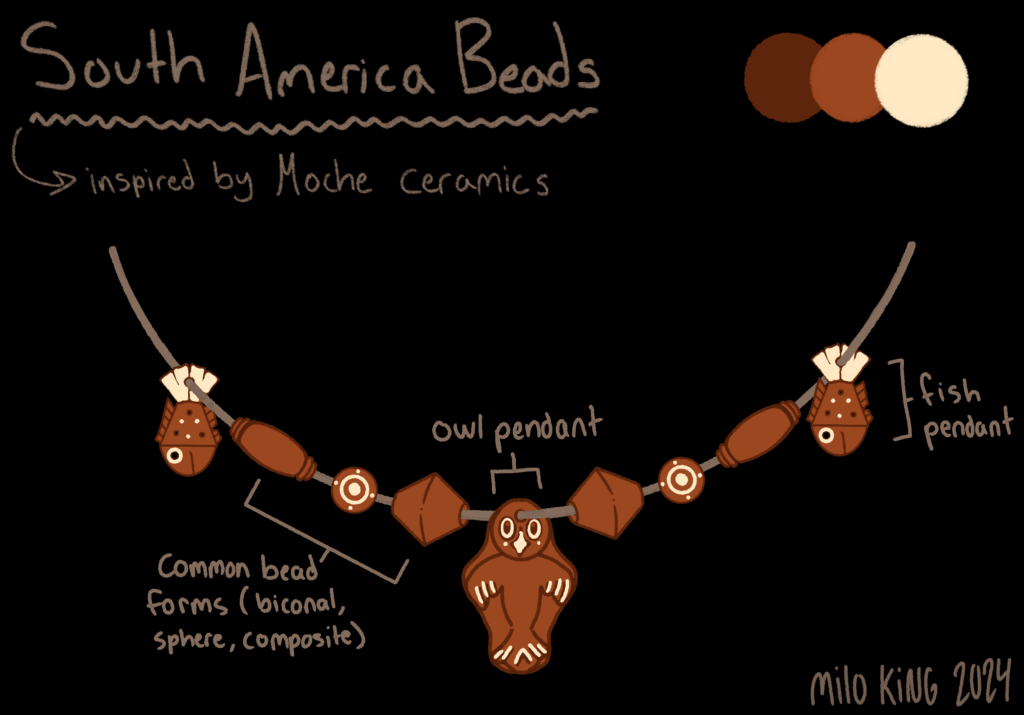
Alright everyone, here’s the plan for the upcoming week: by following my illustration (shown above), I will shape the beads, dry the beads, and paint the beads before firing them. The good news is that I only have to fire these beads once since the slip paint I’m going to be using doesn’t need a second firing. The bad news is that slip paint needs to be painted onto leather-hard clay, so I’ll have to tread a very delicate line between too-wet and too-dry beads when I paint them.

I chose the owl and fish pendants because they were too charming not to include in my final product, even if they do end up looking a little wonky because of how detailed they are. I’m not willing to tango with red slip paint, so I’ll be using white slip paint to embellish the pendants as well as to add decorative Moche patterns to my spherical beads. I’ll check back in next week with a progress update, see you then!

Glazed and Fired! (+ February Plans)

I’m pleased to report that I finally got around to glazing my first set of beads this week, and I’m waiting with my fingers crossed to see if all of the glazes I chose behave in the kiln. I used Amaco’s Hot Red and Opaque White as well as Teacher’s Palette’s Leaf Green and Midnight Blue for my beads as shown below:

(You might notice that there’s a gray glaze here instead of Leaf Green which was a total accident, I promise I actually used Leaf Green on the beads)

Glazing beads–especially the spherical ones I made this month–is soooo much harder than I anticipated, and I think painting just these 7 took me nearly 2 hours all together. The trickiest part about the glazing process was making sure every bead had an even coat for all 3 passes (3 coats is the general rule of thumb if you want your glazes to be opaque in the end!). I’ve already got some ideas for how to improve my techniques for next time, starting with actually carving out my designs in the clay and now just painting them on. 

Even though this month felt a little rushed, I’m very happy with what I’ve been able to do with the time I had, and I’ve already learned a lot about beadmaking. I do wish I had been able to add basalt sand to my clay as a tempering (stabilizing) agent to emulate the Purépecha peoples’ ceramics process, but nobody on Earth is willing to sell small quantities of basalt sand and I’m not sure my mother would have appreciated the leftover 20-pound bag of sand if I had bought some at Home Depot. 

I’ll be sure to add pictures of my North America beads as soon as they’re out of the kiln, but until then get excited about South America month!! For February, we’ll be taking a peek at Peruvian ceramics while I try not to blow up the kiln with more beads. See you then!